voir l'intérieur


Follow Me on Pinterest


Spilt Milk 

(mon blog photo)

pancartes Portfolio Tutorials papertoys Magic Sketchbook Free stuff Motifs de t'a moi Oizos! lapin!

Archives

Entries in Tutorials (52)

Sunday
Aug122012

How to use smart objects for pattern making

This is a video I made to explain how to make patterns with multiples of the same picture. I will duplicate this little cat and when I change it, it changes all the copies too! 

I can't say the video is professional and perfect, but I hope it will help you  work more efficiently. 

This tutorial is for people with basic understanding of Photoshop ( as in : you know how to use layers )

And, hum. I apologize for my awful English!

See it in a better resolution here:

http://youtu.be/gkqNs0c5wTs

Wednesday
Aug012012

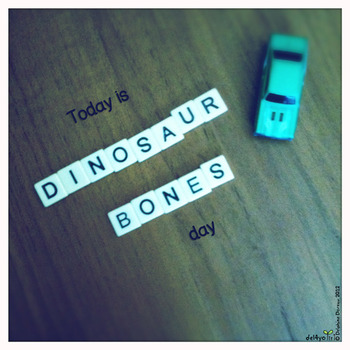
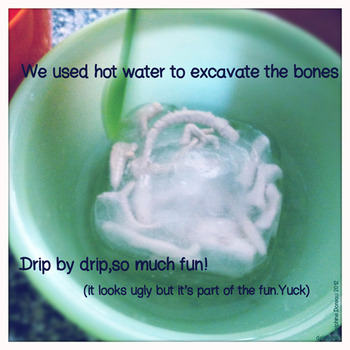
Dinosaur bones

These ideas are all over the internet, but I do recall I got the ice one from the oh so very clever Angélique, and the idea of the clay skeleton was inspired by my friend Gio Nakpil. I used to drop by his desk, and discuss fun and cute thing while kneading some clay...and admiring the wonderful monsters that comes out of his fertile imagination to populate his studio.  I do miss those delightful moments!


Anyway:

And it's an exciting day! At least if you are five, like we are.

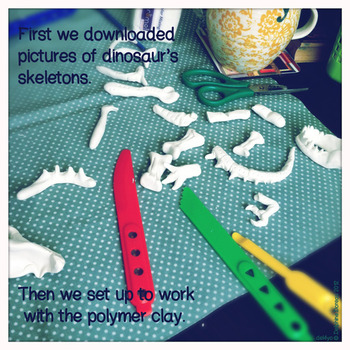
We made only half a skeleton, so it's possible to put it together flat and it looks like a Trex ( sort of).
I didn't go on the crazy path of actually creating a full 3D one. Don't make it too big. Our bigger piece was the head, 2 inches and a half or so, and it was a bit difficult to excavate later. I made the head and the tail and my son made the simpler bones. We added textures and marks on the bones to make them more real and interesting. So much fun!


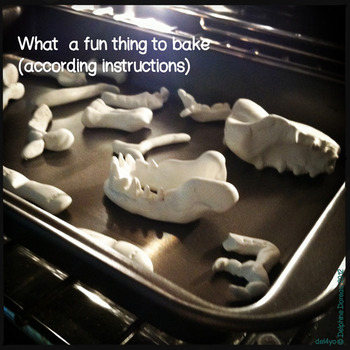
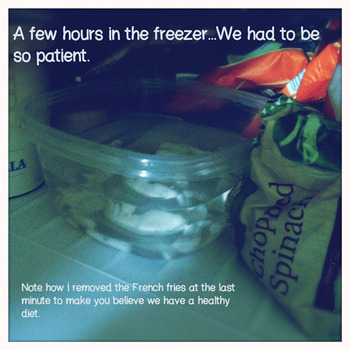
We baked them 45 minutes, and then we had to wait for it to be cold and sturdy enough to touch it, and play. The next step was to add water.

Don't put too much water or take too large of a container, or it will take hours, and the game will be slow and frustrating (thanks Angelique for the tip)

And then:


Polymer clay is basically plastic. Properly cured it can stand water and low temperatures, at least for a while.

We read a good picture book while waiting : How the Dinosaur got to the Museum, by Jessie Harland.
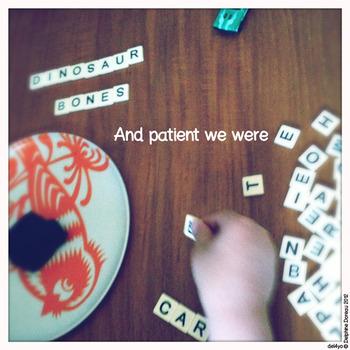
And then we had lunch. And waited again. 

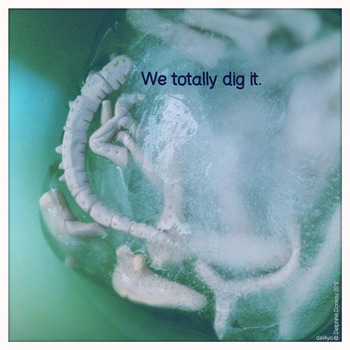
And then, here comes the fun! I unmolded the giant ice cube in a larger bowl and...

We re-used the water for watering the plants and another run in the freezer.

Because it was so exciting, really, we had to do it again. 


Have fun! If you don't feel like sculpting and baking, skip that part and use plastic dinosaurs.


Tuesday
Jul242012

Summer crafts

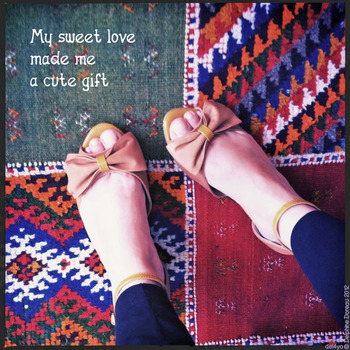
 This shoes are so cute. It's an LA brand so we are kinda buying local :D
(Pansy from Seychelles

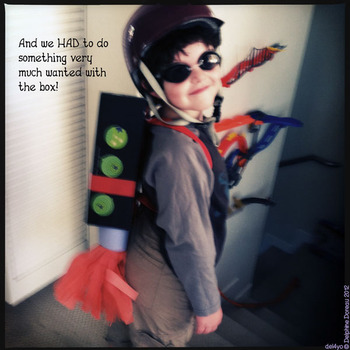
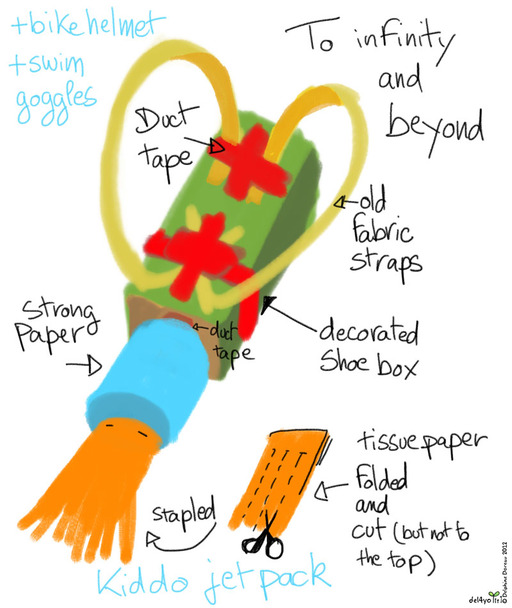
A Jet Pack!! All we needed was the shoe box, duct tape, strong paper and old straps. Because, you know, every little boy needs a jetpack.


But boy, you can't jump in the stairs : it won't make you fly. 
We put on Earth Wind and Fire "Let's Groove"  and danced and jumped!

Sunday
Jun102012

Temporary wall stickers

Real wall stickers are cool and cute, but sometimes a bit expensive, and I wasn't sure I really wanted some in my bedroom.

So I took one of my favorite designs (a swallow inspired from a vintage French drawing lesson), vectorized it, added a bit of my favorite patterns, and made my very own temporary wall stickers ! I love the way this project turned out and it's one of my favorite crafty project ever!


Unfortunately I can't give you the pictures I made : I am waiting for Spoonflower wall stickers to be in.  I will then make real ones, and if this next step works I will make sure to share with you. 

But here is what you need if you have a cute design you would like to transform to a wall sticker:


Here is how to do it

1. Print and cutout your designs. 

2. Place them on the wall. Use masking tape to place them ( make sure your paper designs can handle it-some of mine didn't, depends on the paper)

3. Test your glue! I used a removable glue stick I found here . I tested it on the wall and made sure it was removable with no residue. Depending on your wall covering, it might work differently. It's the kind of glue you will find on post-it ® so it's quite harmless. I expect my stickers to curl and fall at some point, but in the dry LA weather it should be OK for a few months.

4. Glue the stickers using the plastic card to flatten any bubble.

Enjoy your new art!

- - - - - - - - - - - - - - - - - - - - - - - - - - - - - - - -


Les stickers muraux , c'est très joli, mais je n'étais pas très sure que ça irait au dessus de mon lit. Mais bon, après le dernier (petit) tremblement de terre , j'avais besoin de me réconcilier avec mon mur. 

J'ai donc pris un de mes designs préféré (une hirondelle inspirée d'un cours de dessin français vintage), puis je l'ai vectorisé (je déteste ça), ajouté un peu de mes motifs préférés, et fait mes propres stickers muraux temporaires!  Le résultat est impressionnant, pour une poignée de dollars.

Bon: je ne vais pas vous donner mes stickers. J'ai un peu peur de les retrouver imprimés pour de vrai ailleurs...mais pas par moi. Et ensuite, j'ai vu que Spoonflower va bientôt faire des stickers et à ce moment la, non seulement je les ferais pour de vrai pour moi, mais encore je les partagerais avec vous!


Si vous voulez faire quelque chose de similaire, voici comment faire:


1.Imprimez et découpez vos dessins.


2. Placez-les sur le mur. Utilisez du masking tape pour les placer. Assurez-vous que vos créations en papier peuvent le supporter, moi j'ai déchiré un sticker. Après j'y ai été au pifomètre, hop ( je ne suis pas patiente).

3. Testez votre colle! J'ai utilisé un bâton de colle amovible que j'ai trouvé ici. Ce n'est pas de la colle en stick classique, attention! Je l'ai testé sur le mur et vérifié que ça ne laissait ni tache ni résidu. En fonction de votre revêtement mural, ça pourrait fonctionner différemment. C'est le genre de colle que l'on trouve au dos des post-it ® ça colle juste assez. Je m'attends à ce que mes stickers se décollent et me tombent sur le nez, mais avec le climat très sec de Los Angeles je pense que ça va tenir quelques mois. 

4. Collez les dessins en utilisant la carte en plastique pour aplatir les bulles.

Profitez de votre nouvel art mural. C'est top!

Tuesday
Feb072012

Light Shelf Tutorial

Do you remember the light shelf I made to put the cute prototypes I made for my book?

Here's the tutorial so you can make your own:

you will need a long strip of balsa (find it in art stores) , white glue, paint, and command strips


Sunday
Aug072011

Toy cars add-on simple tutorial

Last Saturday my husband got up with the boy, got me a cup of coffee and let me enjoy an hour in bed with my iPad and Pinterest -Pure bliss. I got up to find the boys hooked in a new activity. Prezd (my husband) had cut out cereal boxes to make wings for toy cars. Such a clever update, the boy was head over toes about it.

I made some pictures to show you, and scanned and made  a template you can use with most 1:64 scale toy cars. Print it making sure that the center square is around 3 cm (3/4 inches) , cut it out, and use it as a template to trace the wings on light cardboard. Cut out, add some fun colors, grab some tape or your favorite mt masking tape, glue on the car, and shout for joy!

Samedi dernier, mon mari a embarque mon petit Loulou , m'a fait une tasse de café et m'a laissée tranquille au pieu avec mon iPad et Pinterest-youpi . Je me suis levée pour trouver les garçons passionnés par une nouvelle activité. Prezd (mon mari) avait coupé des boîtes de céréales pour faire des ailes pour des petites voitures. Avec une telle mise à jour, le Bu était aux anges. 

J'ai fait quelques photos pour vous montrer, et scannés et vectorisé un modèle que vous pouvez utiliser avec la plupart des petites voitures à l'
échelle 1:64. Imprimez-le en vous assurant que le carré du centre est d'environ 3 cm (3 / 4 pouces),  découpez,  et  détourez le pour tracer les ailes sur du carton léger. Découpez, décorez, ajoutez un morceau de scotch ou de votre ruban autocollant mt préféré,c'est bon, vers l'infini et l'au delà, les martiens attaquent, tout ça.


Monday
Jun202011

Clothespin dolls tutorial

I was about to link to the tutorials I followed to make my dolls, only to realize that I followed more than 3 to finally make my own stuff, and that none explained how to paint the faces in a satisfying way. So I put everything together in my very own tutorial so you can make cuties all by yourself.  

This tutorial isfor personal use only. If you want to sell some dolls, please invent your very own model.

Enjoy!


I can't remember where I got the closthespins, probably at Blicks. You can find them easily, just look for traditional wood clothespins

I used fabrics from a quilting bundle I found a while ago at SuperBuzzy. It was unexpensive, but they don't sell samples for the moment. Any quilting fabric will do. Fabric lighter than quilting will fray, and heavier are impossible to drape on such a small object. Pinking shears are a must. I tried to make the skirts with bands of fabric , but the dolls having no waist at all makes it an impossible challenge.

For the paint I used Holbein's Acryla gouache, which is quite expensive. But the palette is very nice and girly, so I can buy my favorite colors and paint right out of the tube, and fix any problem later. The finish is the same soft finish as gouache, but water resistant enough for that kind of project. I could forgo the varnish process altogether, which I hate because it changes the colors and I'm messy and impatient. It dries a bit lighter than painted just like gouache, and is very much forgiving for color blocks, much more than classic acrylic. So it was really perfect for my little project. I bought half a dozen of my favorite colors (shell pink, mustard, leaf green,pale aqua, etc) and was perfectly happy with my purchase.


Il est possible de trouver ces pinces à linge en France. J'en ai trouvé ches Perigot, mais il ya surement d'autres endroits. Je n'ai pas traduit ce tutoriel, mais si vous n'arrivez pas à comprendre demandez dans les coms, je serais ravie de vous aider. Pinking shears, par exemple, ce sont des ciseaux cranteurs. Et quilt weight fabric, c'est de la bete toile de coton pas trop epaisse, le genre qu'on utilise pour le patchwork.

Thursday
Jun092011

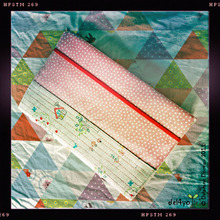
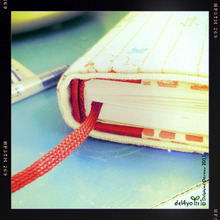
Sketchbook cover for the crafty artist.

It is possible to find cute sketchbook, but the paper is often so-so. Sketchbooks with extra nice paper are designed for serious people, preferably male, in unfavorite colors like brown or black. Unless one can import Italian sketchbooks (the only fancy pretty ones), one will be stuck with a black sketchbook. I find drawing pretty things in a black sketchbook  frustrating if not uninspiring. I used to glue fabric on my sketchbooks, but gluing light fabrics on black is a time consuming challenge! 

So I bought a very pretty and expensive Italian sketchbook from Fabriano, only to realize that the cover was so nice I wanted to protect it.

Going through my Japanese Craft books I was remembered that fabric book covers are quite fashionable. So I tried to design a simple but extra cute book cover for my sketchbooks, and added an elastic to make sure they won't open in my bag. This is my first attempt, it's very simple, but I made a tutorial anyway for those of you who want to give it a try!


En Français: un inch c'est 2,54 cm! Posez des questions dans les coms si vous ne comprenez pas, je repondrais avec plaisir.