voir l'intérieur


Follow Me on Pinterest


Spilt Milk 

(mon blog photo)

pancartes Portfolio Tutorials papertoys Magic Sketchbook Free stuff Motifs de t'a moi Oizos! lapin!

Archives

Entries in Tutorials (52)

Friday
May272011

The tiniest Photoshop tutorial in the world

I had two emails from friends recently, asking two different questions...Which happened to have exactly the same answer!

The first one wanted to know how to add colors to the color palette in photoshop. The other one was wondering why she kept losing her new brushes. The answer is:

Yup. Look for this tiny icon. In any palette, it will help you save or add and element. In the color palette, it will save the color, and prompt a window so you can name it. In the brush palette, it is essential. When you create a brush, you can use it, but it's not saved. You need to click on that icon on one of the brushes palette to be able to save the brush so you can keep it and use it again.  

You will find this icon on most photoshop palettes, use it to add or save specific items. 

---------------------------------------------------------------------------------------

Deux de mes amies, qui sont deja très à l'aise graphiquement, m'ont écrit récemment pour me parler de soucis Photoshopesques (je me demande bien pourquoi tiens, après tout ça ne fait que argh-20 ans que j'utilise la chose). Les questions étaient différentes, mais les réponses similaires. 

Cherchez l'icône qui ressemble a une petite feuille pliée. L'une avait une question sur les palettes et cette icône permet d'enregistrer des couleurs. L'autre se demandait comment garder ses brosses, une fois crées? Cherchez l'icône! Elle permet de sauver ou d'ajouter un élément.

Cherchez la sur toutes les palettes : layers, brushes, couleurs, etc. C'est la petite clef qui vous permettra d'avancer!


Wednesday
May112011

Cake topper tutorial

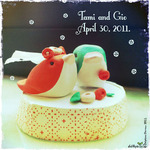
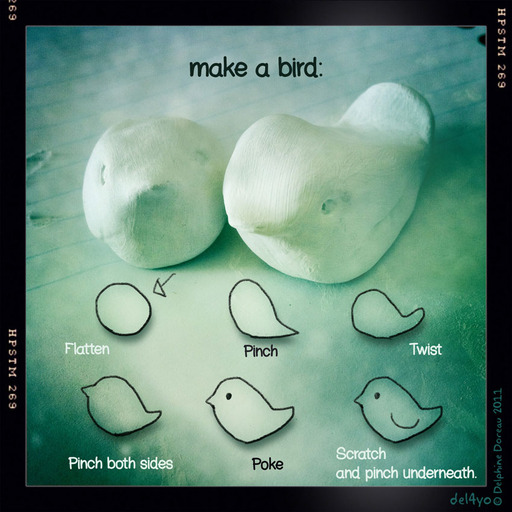
The cake topper I made for my friend is fairly simple to do, but I realised that if you don't know how how to, it's difficult to know where to start.So I made a little tutorial for those who want to try a hand at it. You will need air dry clay, acrylic gouache (or acrylic paint) , a bit of cardboard , a bit of Japanese masking  tape

 The biggest tip I could give you if it's the first time you try your hand at it, is to remember it's not about perfection but about having fun and sharing a bit o'love.


Let's go! First, how to make the shapes:


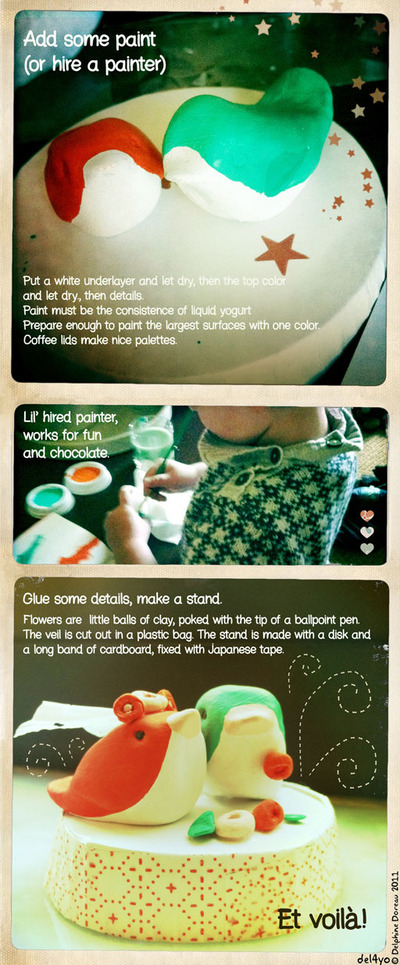
Then, how to paint them:

Acrylic paint and clay shouldn't be in contact with food, so make sure to add a stand! 


Thanks to my friend Adélie for her patience and help to choose the right clay while my son was cavorting around us, and thanks to my son for the help, love, choosing the greens because ti's his favorite color , and for sharing my brushes and his chocolate, always.


Pas de Français cette fois-ci, c'etait trop compliqué, demandez-moi dans les coms si vous avez des soucis de traduction?

Monday
Jul052010

A simple solution for color settings

Lost in a sea of colorsettings? Here's the trick:

Just make sure you have IN what you need OUT.


Si vous voulez vous en sortir avec les Colors settings, rappellez vous juste que vous devez avoir les mêmes settings en ENTREE et en SORTIE. C' est tout.

Donc pour blogguer, il faut voir du sRGB,ouvrir ou créer un sRGB, sauver un fichier en sRGB. Ça parait facile maintenant, non?

Wednesday
Jun302010

A brief introduction to color settings

If you already asked yourself why your pictures were not the same colors when you send them via mail, or why they don't look the same on the internet and on your computer, this tutorial is for you.
It's been 19 years now that I use Photoshop for movies, prints on paper and the internet. Photoshop is pretty straightforward, but there's a few things that were always difficult to handle.  The color settings is one of these. It's a very important point, and I'm always surprised to see how little artists actually know or care about it!
Here's a picture seen on my mac with basic color settings, and exactly the same when seen on a basic browser on the internet.  Do you see the point? 
When you draw on a piece of paper, a picture is a picture and what you see is what you get. 
But you always have to adapt to the color of the paper (never perfectly white) and the impediments of the medias ( no luminous red in gouache).
On your computer it's just the same. There's parameters. At some point programers found interesting to try to counter balance the picture you have on your screen with color settings, to fit some use or another (web, print, cinema). It's like, the temperature of color is so and so, but it displays differently with different color settings. Talk about a pain for the color lover.
There's color settings on every steps of a picture process, and very little people are aware of them. Your scanner will apply one set, then the software you use, then the printer, and sometimes the internet browser. It's very difficult, even for professionals, to be aware of every steps. If it's not consistent form beginning to end, the colors will change and it can be a huge problem. 

There's 3 kinds of color settings in Photoshop. You will have settings that applies to the software itself and the way it displays pictures. You will already have some settings on the picture itself, or you can apply some in Photoshop. And then you will have the possibility to export your picture in a setting or another.

Weirdly enough, the way to change the color settings isn't the same from one Photoshop version to another. Please check your documentation for more information.Before doing any picture, check the settings (shift+command+K) or choose edit>color settings in newer versions, looking in the preferences for older versions.  Choose according to your needs. For the internet, it's better to choose sRGB, even if some browsers like Safari are able now to detect a different profile.

I'm not really fond of SRGB, but I had to adapt myself to it because it's the default one in numerous applications (baaah). Then make a new picture according to these settings, or open a pre-existing one. Say yes when asked to convert to the new settings. Color will look different sometimes, it can even be a HUGE surprise. Correct accordingly. You a can also assign (dangerous) or convert (better) an opened picture to the new setting (look in the Edit menu to find these options).  Photoshop has also a specific module for saving for web and devices  (File > Save For Web & Devices) 

 It's different in each version, but basically, look around until you have found the "convert to" and"saves as" sRGB option. It doesn't exist in all the versions. If you have an older version (pre CS3), make sure you converted your picture in sRGB first. If you don't pay attentions and build a picture in Photoshop with unadapted color settings ( like Adobe 1998 instead of sRGB for the net), then it might appear different on a media that accepts only sRGB. I learned it the hard way with Non Dairy and had also the problem with my first Moo Cards. It is important to make sure that, in and out, all your color settings match.

In conclusion, I recommend to ALWAYS check with your client what kind of color setting they need for the finished product. If the client doesn't know, choose sRGB by default, and ask for test prints if possible.

(dites si vous ne comprenez pas, demandez dans les coms, je ferais une traduction, mais la je n'ai pas le courage d'y passer les heures nécessaires, merci!)

Wednesday
Aug052009

Dessine moi un oiseau

I was reminded recently of my old "wise owl project":  teach the others to be creative so they won't steal my designs. Since I noticed people are very eager to steal my birds, here you are. For the bad who wants to steal, for the kind who want to play , a tutorial to draw your very own birdies.

And a huge XOXO for your kind support, especially to the dear friend who sent a cute card and something pink to cheer me up. It worked! Thank you.

Bon alors, un post special pour les loulouttes pas futees qui piquent mes pious : puisque vous n'avez pas d'imagination, je vous ai fait un tuto. Allez, au boulot. Pour mieux faire, voyez Prevert, ca vous fera pas de mal.

Pour les autres, les gentils, les gentilles, les choupidous tout pres a envoyer des tonnes de chocolat outre Atlantique : des bisous. Et a vos crayons pour la grabouille!

Et puis j'ai fait tres mignon au cas ou Isabelle regarde, et mis des ombres pour faire marrer la Trollette. Mais ca profite a tout le monde, pas de jaloux. Voila!

Monday
Jul132009

Rattle and rock

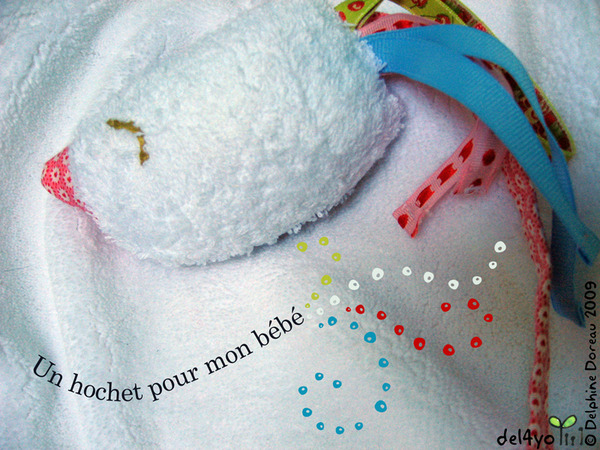
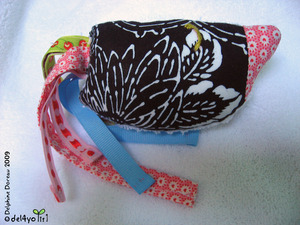
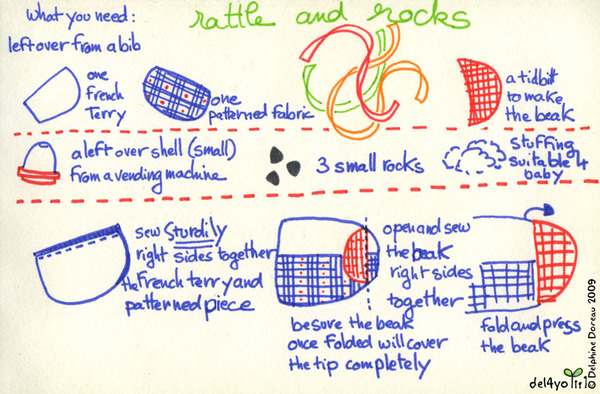
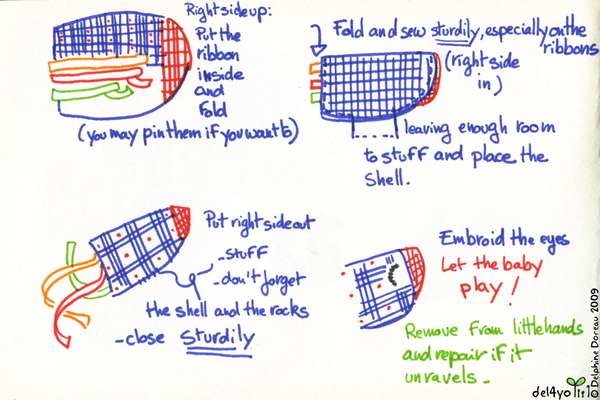
I'm learning to quilt, and one reason is I just hate throwing away fabric scraps. While sewing my bibs (bib tutorial here)I was a bit frustrated to cut off this big chunk of fabric in the middle. I decided to try my hands at a rattle with the scraps . It is just the right size for little hands and too big for a little mouth. Follow my tutorial at the end of the post. No commercial use, no redistribution, please link, don't post, thanks!

If you do the pattern, it would be lovely to post pictures in the flickr groupI did it with Del!

Je deteste jetter des bout de tissus. Je ne peux pas, ca m'enerve! Mon patron de bavoir laisse un bon petit bout tout rond au milieu. Ca m'ennuyait, alors j'ai decide de me lancer,et de faire enfin un hochet juste de la bonne taille pour mon fiston, ni trop petit, ni trop gros.Voici les instructions en anglais...Si vous avez du mal a suivre, sew right side in c'est coudre avec l'endroit du tissus dedans. Et si c'est toujours top dur, sonnez les cloches dans les coms, je traduirais.

Pas d'usage commercial, ne copiez pas mes images, il n'est pas pemis de reposter, ajoutez plutot un lien, merci!

click for bigger images

I forgot to tell to hem the ribbons to be sure them won't unravel. Please keep in mind that the baby will put it in his mouth and shake it as strong as he can. Make it extra sturdy and double those stitches!

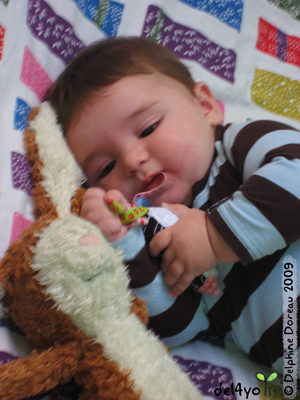
Et voila! Happy baby:

Si vous faites ce pattern je serais ravie de voir des photos! Vous pouvez les ajouter au groupe Flickr I did it with Del!

Tuesday
Jul072009

A cute bib

(my boy 2 years ago)Large bibs are nice for meal time, but when comes teething time, it's so frustrating to hide cute outfits under a big bib all day long!

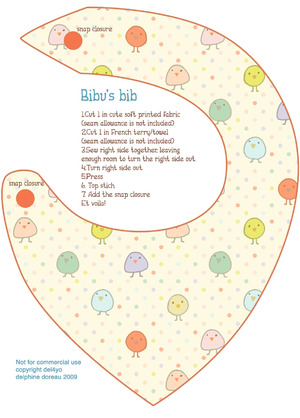
I got some smaller bibs my dear Maman sent me from France, and spotted some here that looked liked scarves. Cute! I find links a bit dangerous, and a scarf like turns too easily on the back. So I worked on a scarf model that will turn less. I did a side closure because I can't imagine something more frustrating than waking up a baby while removing his bib.I had fun making different bibs from cute Japanese fabrics and ditsy flower fabrics. My boy was cute as a button wearing it. Here's the pattern for you to print and see for your personal use only.

If you do the pattern, it would be lovely to post pictures in the flickr groupI did it with Del!

Click on the pattern to download the PDF. Enjoy!


click for pattern download

French translation

Les grand bavoirs sont pratiques pour manger, mais quand vient le temps des petites dents, bof. Cacher le plus mignon des Tshirts du monde sous un bavoir Winnie the Pooh, on se lasse vite. Ma Maman à moi m'a envoyé des bavoirs trop choupidous de France, et puis j'ai remarqué des bavoirs forme foulard ici qui étaient mignons. Sauf qu'ils tournent autour du cou de bébé en dix minutes recta, bof bof. Donc j'ai essaye d'en faire un de forme un peu conique pour que ça reste assis sur les épaules ( c'est pas parfait mais c'est mieux) , et puis avec un bouton de cote parce qu'il n'y a rien de plus énervant que de réveiller un bébé en lui ôtant son bavoir. Le pédiatre m'a bien expliqué qu'on ne laisse pas le bavoir autour du cou d'un bébé qui dort, des fois qu'il y aurait un hameçon a espadon dans le berceau, il pourrait s'accrocher ( du moins c'est ce que j'ai cru comprendre mais il parle dans sa barbe). Vous pouvez télécharger le patron en cliquant dessus, pas d'usage commercial, et si vous péchez au gros ne laissez pas traîner vos hameçons, merci. Pour celles qui ne lisent pas l'anglais, voici la traduction du patron:

Attention les coutures ne sont pas comprises. Couper une fois dans un tissus très doux, une fois dans du tissus éponge ( le plus fin le mieux). Coudre endroit contre endroit en laissant de quoi retourner, retourner, repasser, surjetez, ajoutez deux pressions et hop c'est fini!

Si vous faites ce pattern je serais ravie de voir des photos! Vous pouvez les ajouter au groupe Flickr I did it with Del!


Saturday
May232009

Tutokipue

(sorry, in French today. I explain how to male a play dough helicopter)

Il vous faut:


  • Un enfant de deux ans a peu pres, ou plus ou moins, ou beaucoup plus, ou beaucoup moins (au choix) 
  • De la pate a modeler de deux couleurs ( sinon c'est pas drole)


©del4yo Delphine Doreau 2009


Demain on fait des abeilles.